Got Knee Injuries? Back Pain? Try these 3 Pilates stretches
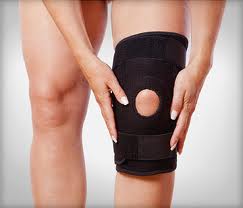
Earlier today I was stretching at the gym and the man near me, George, struck up a conversation. He asked if I knew any stretches for lower back pain. While probing a little further he mentioned that he recently had knee surgery, and the lower back pain started after that.
That makes sense. The knee is the largest joint in the body and, as it connects the thigh with the lower calf and bears the brunt of the body’s weight, it is quite susceptible to injuries. According to the American Academy of Orthopaedic Surgeons (AAOS), “More than 800,000 hip and knee replacement surgeries were performed in 2003 in the United States.”Many times a person with a hurt knee will try to compensate for this by shifting weight to the other knee, thereby making other body parts unbalanced, like the hip flexors, which in turn can cause lower back pain.
I suggested he try some Pilates moves.
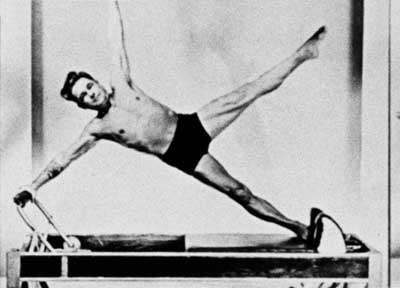
In case you were wondering, The Pilates Method was started by Joseph Pilates in the 1920’s. Joseph was a German born circus performer and boxer living in England. When World War I started he, along with other Germans, was put in an internment camp. With limited tools available, he developed exercises that made the basis of the Pilates mat exercises you see today. He began helping injured detainees and became known for his rehabilitation success. After the war he moved to New York City where his studio was located near all the dance studios, and his methods became very popular among Broadway’s finest as well as elite athletes. People he taught opened their own Pilates studios and it caught on from there.
Pilates focuses on strengthening your core, which is comprised of the muscles of your abdomen and back. As your torso gains strength and flexibility so do your limbs supporting the spine. These poses require nothing more than a mat and can be done at home as well as the gym.
These photos and instructions are quoted from Pilates.About.com. See the full article here.
“Child’s Pose – Here’s How:

- Begin kneeling on your mat with your butt on your heels.
- With your toes together, open your knees to at least hip distance apart.
- Lean forward and drape your body over your thighs so that your forehead rests on the floor.
- Reach your arms out in front of you. Alternately, you can leave your arms along your sides. Try both and see which feels best to you.
- Breathe deeply and relax. Release any tension you might be feeling in your back, neck, or hips. Give this exercise time to work. It can take a few minutes to allow your body to deepen into the stretch.
Spine Stretch – Here’s How:
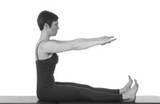
- Sit up tall on your sit bones. Your legs are extended about shoulder width apart, and your feet are flexed.Reach the top of your head to the sky but let your shoulders stay relaxed. See image above.
- Inhale and extend your arms out in front of you, shoulder height.A modification here would be to place the fingertips on the floor in front of you between your legs.
- Exhale as you lengthen your spine to curve forward. You are going for a deep C-Curve. Allow a deep release in the hips as you keep your shoulders down and reach your fingers toward your toes.
- Inhale and reach a little further as you enjoy the fullness of your stretch.
- Exhale and initiate your return by using the lower abdominals to bring the pelvis upright. Roll up through the spine to sitting.
The Saw- Here’s How:
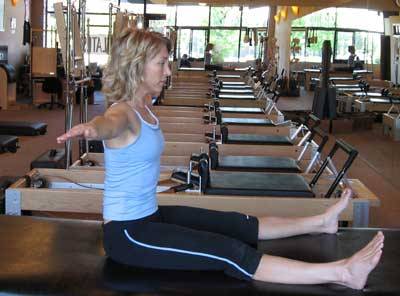
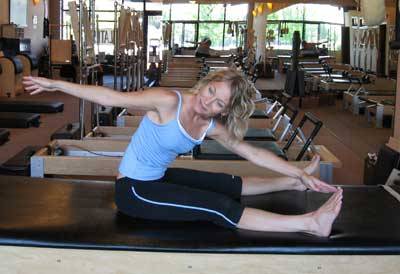
- Sit up straight on your sit bones.
- Your legs are extended in front of you, about shoulder width apart. If you have tight hamstrings you may need to prop your hips up on small lift, like a folded towel.
- Arms are stretched out to the side, even with your shoulders.
- Inhale: Get taller as you turn your whole torso, but use your abs to keep your hips even with each other.
- Exhale: Let your gaze follow your back hand as you stretch forward and reach the pinky finger of your front hand across the outside of the opposite foot.
- Exhale a little more as you reach a little further.
- Once your reach extends to its furthest point, maintain your turned position as you inhale and return to sitting.
- Exhale and undo your turn, coming to the starting position.
- Repeat this exercise 3 times to each side.”
Hope you find this helpful!
Lisa
Thanks for the tip… no sense in putting it off, will try them now.
Good! Hope they help!
Yeah. I will need to try those. My knees are sore lately.
Hope they help – I usually feel better after doing them.
Thanks Lisa,
I started bowling in a league again (after 20+ years off) and really notice my knees. I wear supports on both knees to help with the twisting, but it is not enough. I am going to try the exercises and will let you know how it goes.
Thanks again,
Hi Dennis,
We just went bowling on Saturday – I love that game! Hope the exercises help 🙂